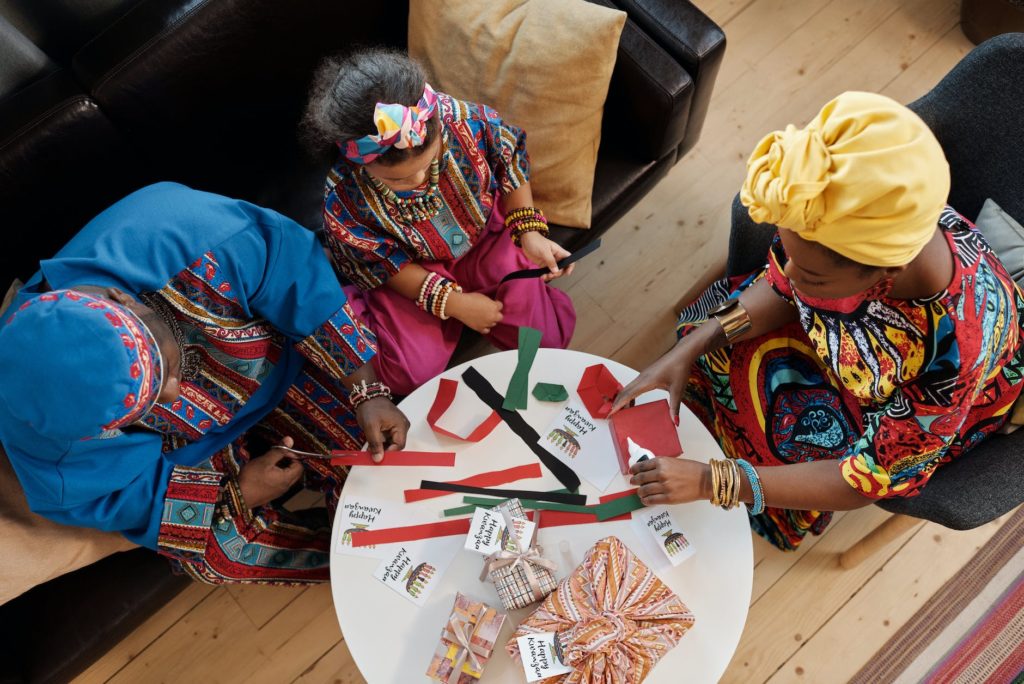
Getting Crafty for the Holidays
The holiday season is the perfect time for holiday crafts for kids. Engaging in craft activities not only brings joy and excitement to children but also offers numerous benefits. In this section, we’ll explore the benefits of holiday crafts for kids and the supplies you’ll need to get started.
Benefits of Holiday Crafts for Kids
Holiday crafts provide a range of benefits for children. They stimulate creativity, encourage self-expression, and foster imagination. Engaging in craft activities also helps develop fine motor skills as kids manipulate various materials such as paper, glue, and scissors. Additionally, crafting during the holidays allows children to explore themes related to the season, such as snowflakes, reindeer, and Santa Claus.
Crafting together as a family promotes bonding and creates lasting memories. It’s an opportunity for parents and children to spend quality time together, sharing laughter and creativity. Craft activities for kids can also be educational, teaching them about colors, shapes, and textures. For more craft ideas and inspiration, check out our collection of seasonal crafts for kids and educational crafts.
Supplies You’ll Need
To get started with holiday crafts, you’ll need a few basic supplies. Here’s a list of essential materials to have on hand:
| Supplies | Description |
|---|---|
| Construction Paper | Assorted colors for various craft projects |
| Scissors | Child-friendly scissors for safe cutting |
| Glue Stick | Easy-to-use glue stick for adhering paper and lightweight materials |
| Washable Markers | Vibrant markers that are easy to clean off hands and surfaces |
| Paint | Water-based paint for creating colorful masterpieces |
| Paintbrushes | Different sizes for various painting techniques |
| Pipe Cleaners | Bendable wires for constructing shapes and figures |
| Popsicle Sticks | Versatile sticks for building structures and ornaments |
| Googly Eyes | Wiggle eyes for adding fun and character to crafts |
| Pom-poms | Soft, colorful balls for decorating and embellishing crafts |
| Sequins | Shiny, decorative elements for adding sparkle to projects |
| Craft Glitter | Glitter for a touch of magic and shimmer |
| Craft Paper Plates | Sturdy plates for creating wreaths and other decorative crafts |
| Cotton Balls | Fluffy balls for crafting snowmen and clouds |
| Ribbon | Colorful ribbon for hanging ornaments and adding finishing touches |
These supplies provide a good foundation for a variety of holiday craft projects. Depending on the specific crafts you choose, you may need additional materials such as salt dough, popsicle sticks, or yarn. Remember to supervise young children during craft activities and ensure that all materials are age-appropriate and safe to use.
With the benefits of holiday crafts and the necessary supplies in hand, you and your children are ready to embark on a joyful and creative crafting adventure. Let your imaginations soar and enjoy the special moments of crafting together as a family.
Festive Ornament Crafts
The holiday season is the perfect time to get creative with your little ones and make festive ornaments to adorn your Christmas tree or give as heartfelt gifts. In this section, we’ll explore two delightful ornament crafts that your kids will enjoy: Handprint Reindeer Ornaments and Salt Dough Snowflake Ornaments.
Handprint Reindeer Ornaments
Handprint Reindeer Ornaments are a cherished keepsake that captures the magic of your child’s handprints during the holiday season. To create these adorable ornaments, you’ll need a few simple supplies:
- Brown craft paint
- Googly eyes
- Red pom-pom or small red button
- Brown pipe cleaners
- Ribbon or string for hanging
Here’s how you can make Handprint Reindeer Ornaments:
- Start by applying brown craft paint to your child’s palm and fingers. Help them press their hand firmly onto a plain ornament or a round shape cut out of cardboard or foam.
- Once the paint is dry, glue googly eyes onto the thumb area to create the reindeer’s eyes.
- Attach a red pom-pom or small red button just below the eyes to represent the reindeer’s nose.
- Cut brown pipe cleaners into small pieces and twist them to form antlers. Glue them on either side of the handprint to complete the reindeer’s look.
- Finally, attach a ribbon or string to the top of the ornament for hanging.
These Handprint Reindeer Ornaments will add a touch of personalization to your holiday decor and make for cherished memories in the years to come.
Salt Dough Snowflake Ornaments
Salt Dough Snowflake Ornaments are a fun and easy craft that allows your kids to showcase their creativity. The ingredients for salt dough are simple and can be found in your kitchen pantry:
- 2 cups all-purpose flour
- 1 cup salt
- 1 cup water
To make Salt Dough Snowflake Ornaments, follow these steps:
- In a mixing bowl, combine the flour and salt. Gradually add water and knead the mixture until it forms a smooth dough.
- Roll out the dough on a flat surface to a thickness of about 1/4 inch.
- Use snowflake-shaped cookie cutters or a sharp knife to cut out snowflake shapes from the dough. You can also let your kids create their own unique snowflake designs.
- Place the snowflake shapes on a baking sheet lined with parchment paper.
- Using a straw or toothpick, poke a hole near the top of each snowflake for hanging.
- Bake the ornaments in a preheated oven at 200°F (93°C) for about 2 hours or until they are completely dry and hard.
- Once the ornaments have cooled, your kids can paint them with acrylic paints or decorate them with glitter, sequins, or acrylic markers.
- Thread a ribbon or string through the hole and tie it securely for hanging.
Salt Dough Snowflake Ornaments are not only a fun craft activity, but they also make beautiful additions to your holiday decorations.
With Handprint Reindeer Ornaments and Salt Dough Snowflake Ornaments, you can engage your kids in the joy of holiday crafting while creating lasting memories. For more holiday crafts for kids, check out our arts and crafts for kids section.
Holiday Card Creations
During the holiday season, creating homemade holiday cards can be a fun and meaningful activity for kids. It allows them to express their creativity while spreading joy to family and friends. In this section, we will explore two delightful holiday card ideas: Thumbprint Christmas Tree Cards and Pop-Up Santa Claus Cards.
Thumbprint Christmas Tree Cards
Thumbprint Christmas Tree Cards are a charming way for kids to create personalized holiday greetings. To make these cards, gather the following supplies:
| Supplies |
|---|
| Blank cards or cardstock |
| Green washable ink pad |
| Brown marker or pen |
| Assorted colored markers |
| Glitter or sequins (optional) |
Here’s how to make Thumbprint Christmas Tree Cards:
- Fold the blank cards or cut the cardstock to the desired size for the cards.
- Press the child’s thumb onto the green ink pad to coat it with ink.
- Carefully press the thumb onto the card to create the tree shape. Repeat to make multiple trees.
- Once the ink is dry, use the brown marker or pen to draw trunks for the trees.
- Let the kids decorate the trees using colored markers, adding ornaments, lights, and a star on top.
- For an extra touch of sparkle, they can use glitter or sequins to embellish the trees.
- Write heartfelt holiday messages inside the cards and let the kids sign their names.
Thumbprint Christmas Tree Cards are not only adorable but also serve as cherished keepsakes for loved ones. For more creative projects for kids, visit our article on creative projects for kids.
Pop-Up Santa Claus Cards
Pop-Up Santa Claus Cards are sure to bring smiles to the faces of those who receive them. To make these interactive cards, gather the following supplies:
| Supplies |
|---|
| Colored cardstock or construction paper |
| Scissors |
| Glue stick |
| Markers or colored pencils |
Here’s how to make Pop-Up Santa Claus Cards:
- Fold a piece of colored cardstock or construction paper in half to create the card base.
- Cut out a Santa Claus figure from a different color of cardstock or construction paper. You can find printable templates online or let the kids draw their own.
- Fold the Santa Claus figure in half horizontally, aligning the edges.
- On the folded side of the Santa Claus figure, draw or cut out shapes such as a hat, arms, or a sack.
- Open the card base and place the folded Santa Claus figure inside, aligning the folded edge with the fold of the card.
- Apply glue to the back of the Santa Claus figure, avoiding the areas that were cut out.
- Close the card and press firmly to secure the pop-up Santa Claus inside.
- Let the kids decorate the front of the card with markers or colored pencils, adding holiday greetings and other festive elements.
Pop-Up Santa Claus Cards are not only fun to make but also delight recipients as they open the card to reveal the surprise inside. For more homemade craft ideas, explore our article on homemade crafts.
With Thumbprint Christmas Tree Cards and Pop-Up Santa Claus Cards, your little ones can create heartfelt holiday greetings that will be cherished by family and friends. Let their creativity shine while they enjoy the process of making these special cards.
Decorative Crafts for the Home
Engaging in holiday crafts is a wonderful way to celebrate the season and create lasting memories with your little ones. In this section, we will explore two decorative crafts for the home that your kids will enjoy: paper plate wreaths and pinecone Christmas trees.
Paper Plate Wreaths
Paper plate wreaths are a classic and fun craft that can add a festive touch to your home decor. To create a paper plate wreath, you will need the following supplies:
| Supplies |
|---|
| Paper plates |
| Scissors |
| Colored construction paper |
| Glue |
| Ribbon or string |
| Decorative items like pom-poms, sequins, or stickers |
To make the wreaths, start by cutting out the center of the paper plate, leaving a ring shape. Then, let your kids get creative by decorating the paper plate wreath using colored construction paper, glue, and any other decorative items they desire. Encourage them to explore their imagination and create unique designs.
Once the decorations are complete, attach a ribbon or string to the back of the wreath, creating a loop for hanging. These paper plate wreaths can be hung on doors, walls, or windows, instantly adding a festive touch to your home.
Pinecone Christmas Trees
Pinecone Christmas trees are a nature-inspired craft that brings the beauty of the outdoors inside. To make pinecone Christmas trees, you will need the following supplies:
| Supplies |
|---|
| Pinecones |
| Green paint or markers |
| Glitter, sequins, or small ornaments |
| Craft glue |
| Small pot or base for stability (optional) |
Start by painting the pinecones green to resemble the shape of a Christmas tree. If you prefer, you can also use green markers instead of paint. Once the paint is dry, it’s time to decorate the trees. Let your kids use their creativity to add glitter, sequins, or small ornaments to the pinecones. Craft glue will help secure the decorations in place.
For an added touch, you can place the pinecone Christmas trees in small pots or bases to create a stable display. These delightful decorations can be placed on tables, mantels, or as a centerpiece for your holiday celebrations.
Engaging in holiday crafts for kids like paper plate wreaths and pinecone Christmas trees not only brings joy and excitement but also allows for family bonding and creativity. Encourage your little ones to explore their artistic abilities and let their imaginations run wild. For more arts and crafts ideas for kids, check out our article on arts and crafts for kids. Happy crafting!
Delicious Edible Crafts
The holiday season is the perfect time to get creative in the kitchen with delicious edible crafts. These fun and tasty projects allow kids to express their creativity while enjoying a special treat. In this section, we will explore two festive edible crafts that are sure to be a hit: decorated sugar cookies and chocolate pretzel rods.
Decorated Sugar Cookies
Decorating sugar cookies is a classic holiday tradition that children of all ages can enjoy. Start by baking a batch of sugar cookies using your favorite recipe or a store-bought mix. Once the cookies have cooled, it’s time to let the creativity flow!
Prepare a variety of colorful icing and sprinkles to adorn the cookies. Encourage your kids to use their imaginations and decorate each cookie with festive designs, such as snowflakes, reindeer, or Christmas trees. You can also provide cookie cutters in different shapes to add an extra element of fun.
To make the decorating process more organized and enjoyable, set up a craft area with all the supplies within reach. Lay out the cookies, icing, sprinkles, and any other decorations on a clean surface. This will make it easier for kids to access the materials and create their masterpieces.
Chocolate Pretzel Rods
Chocolate pretzel rods are another delightful edible craft that kids will love making and eating. These sweet and salty treats are simple to make and can be customized with various toppings.
Start by melting chocolate in a microwave-safe bowl or using a double boiler. Dip the pretzel rods into the melted chocolate, ensuring that they are evenly coated. Gently tap off any excess chocolate and place the pretzels on a parchment-lined baking sheet.
Now comes the fun part – decorating the pretzels! Provide an assortment of toppings such as sprinkles, crushed candy canes, chopped nuts, or even mini chocolate chips. Encourage your kids to dip the chocolate-coated pretzels into the toppings, creating unique and festive designs.
Once decorated, allow the chocolate to set. You can speed up the process by placing the baking sheet in the refrigerator for a short period of time. Once the chocolate is firm, the pretzel rods are ready to be enjoyed!
Both decorated sugar cookies and chocolate pretzel rods are not only delicious treats but also provide an opportunity for kids to develop their creativity and fine motor skills. Plus, they make wonderful gifts or additions to holiday gatherings.
Remember to involve your kids in the entire process, from the preparation to the clean-up. Making these edible crafts together is a great way to bond as a family and create lasting memories. For more family crafting ideas, check out our article on seasonal crafts for kids.
So, gather your little ones, put on your aprons, and let the holiday baking and crafting begin!
Tips for Enjoyable Holiday Crafting
Crafting during the holidays is a wonderful way to spend quality time with your kids and create lasting memories. To ensure a fun and successful crafting experience, here are some helpful tips to keep in mind.
Setting up a Craft Area
Designating a specific area for crafting can help keep things organized and make the experience more enjoyable. Find a well-lit and spacious area where you and your kids can comfortably work on your projects. Having a dedicated craft table or using a large plastic tablecloth to protect your surfaces is a great idea, as it allows for easy cleanup and prevents any potential messes from spreading. You can even create a craft corner in your home where you keep all your crafting supplies organized and easily accessible.
Gather all the necessary supplies beforehand and arrange them neatly in containers or trays. This way, everything will be within reach and you won’t have to search for materials while in the middle of a project. If you’re looking for more creative project ideas, check out our article on creative projects for kids.
Safety Tips for Kids
While crafting with kids is a fun and educational activity, it’s important to prioritize their safety. Here are some safety tips to consider:
-
Supervision: Always supervise your kids during crafting sessions, especially when using scissors, glue guns, or any other potentially hazardous materials.
-
Age-appropriate activities: Choose crafts that are suitable for your child’s age and skill level. This ensures they can actively participate and reduces the risk of accidents.
-
Safe materials: Opt for non-toxic and child-friendly materials. Read labels and avoid using sharp or dangerous objects that could harm your child.
-
Proper tool usage: Teach your kids how to use crafting tools safely and provide guidance on proper handling.
For more craft ideas suitable for different age groups, you can explore our articles on diy crafts for children, easy art projects for kids, toddler art activities, and preschool craft ideas.
Making Memories
The joy of holiday crafting goes beyond the final product. It’s about creating treasured memories with your kids. Embrace the process, let your children’s creativity shine, and enjoy the time spent together. Take pictures of your crafting adventures to capture those special moments and create a scrapbook or photo album to commemorate the experience.
Encourage your kids to express their uniqueness and individuality through their crafts. Celebrate their accomplishments and praise their creativity. By fostering a positive and supportive environment, you’ll help build their confidence and inspire them to continue exploring their artistic abilities.
Crafting during the holidays is an opportunity to bond, learn, and have fun as a family. So gather your supplies, unleash your creativity, and embark on a crafting journey that will create memories to last a lifetime. For more seasonal craft ideas, visit our article on seasonal crafts for kids and explore the wide range of educational crafts available. Happy crafting!

