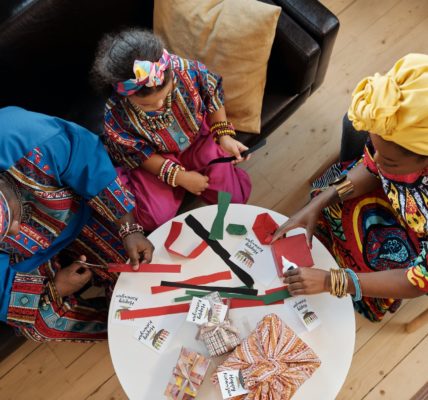
Embracing the Joy of Handmade Gifts
As a crafting enthusiast, I find immense joy in creating unique and personalized gifts for my loved ones. There’s something special about giving a handmade gift that embodies thoughtfulness, creativity, and love. Whether it’s for a birthday, anniversary, or any other special occasion, handmade gifts have a way of making the recipient feel truly cherished.
Handmade gifts offer a personal touch that is hard to replicate with store-bought items. They allow us to express our creativity and showcase our skills. From personalized photo albums to hand-knitted scarves, there are endless possibilities when it comes to crafting heartfelt presents.
Not only are handmade gifts meaningful, but they also have the potential to become cherished keepsakes. When we pour our time and energy into creating something unique, it becomes more than just a gift. It becomes a symbol of our love and care, a memory that can be treasured for years to come.
In this article, I want to share with you 10 unique handmade gift ideas that are perfect for showing your loved ones how much you care. From homemade candles to customized jewelry, each idea is designed to inspire your creativity and help you create something truly special. So, let’s dive into the world of handmade crafts and explore the joy of making personalized gifts.
Before we get started, I invite you to check out our other articles on homemade craft ideas and budget-friendly craft ideas for more inspiration. Let’s unleash our creativity and make heartfelt gifts that will bring smiles to the faces of our loved ones.
Personalized Photo Album
Creating a Memorable Keepsake
When it comes to handmade gift ideas, a personalized photo album is a wonderful way to capture and preserve cherished memories. Whether you’re celebrating a special occasion or simply want to express your love and appreciation, a custom photo album allows you to showcase your creativity while creating a meaningful keepsake.
Designing a custom photo album provides an opportunity to curate a collection of photographs that hold sentimental value. You can include pictures from significant moments, such as weddings, birthdays, vacations, or family gatherings. Adding captions, quotes, or handwritten notes alongside the photos can further enhance the personal touch of the album.
Tips for Designing a Custom Photo Album
-
Choose a Theme: Select a theme that reflects the purpose of the photo album. It could be centered around a specific event, a particular person, or a collection of favorite memories.
-
Organize Your Photos: Before starting the design process, take the time to organize your photos. Sort them chronologically or by theme to make the storytelling flow smoothly.
-
Select the Right Album: Consider the size, style, and materials of the album. Options range from traditional leather-bound albums to modern photo books. Choose one that complements the overall aesthetic you want to achieve.
-
Layout and Design: Experiment with different layouts and designs to create visually appealing pages. Balance the placement of photos, captions, and decorative elements. Utilize online templates or design software to simplify the process.
-
Add Personal Touches: Incorporate personal mementos such as ticket stubs, pressed flowers, or handwritten messages to make the album more special. These elements can evoke memories and add depth to the storytelling experience.
-
Consider the Order: Arrange the photos in a logical sequence to tell a cohesive story. Begin with an engaging opening page and end with a memorable conclusion.
-
Review and Edit: Before finalizing your design, review the album layout to ensure accuracy, clarity, and overall cohesiveness. Make any necessary edits or adjustments to enhance the visual appeal and storytelling.
Remember, the purpose of a personalized photo album is to create a unique and heartfelt gift. It’s an opportunity to share memories, celebrate relationships, and showcase your creativity. By putting thought and care into the design, you can create a one-of-a-kind keepsake that will be cherished for years to come.
For more homemade craft ideas and inspiration, check out our article on homemade craft ideas.
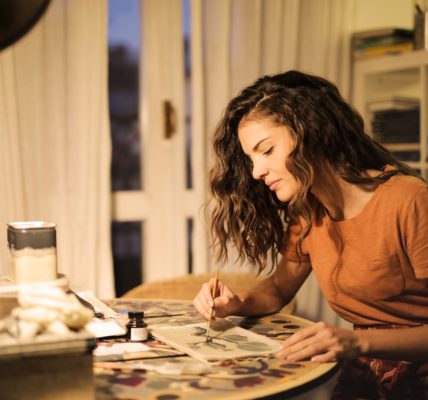
Hand-Painted Ceramic Mugs
Are you looking to add a personal touch to your morning brew? Hand-painted ceramic mugs make for delightful and thoughtful handmade gifts that can brighten up anyone’s day. Whether you’re creating a mug for yourself or as a gift for a loved one, this craft project allows you to unleash your creativity while enjoying a warm cup of coffee or tea.
Adding a Personal Touch to Your Morning Brew
Imagine sipping your favorite beverage from a mug adorned with your own hand-painted design. It not only adds a unique touch to your morning routine but also brings a sense of joy and accomplishment. Hand-painted ceramic mugs allow you to express your personality, showcase your artistic flair, or create personalized designs that hold special meaning for you or the recipient.
To get started, you’ll need plain ceramic mugs, ceramic paint or porcelain markers, brushes, and some creativity. You can find plain ceramic mugs at craft stores or online. Choose mugs with a smooth surface to ensure better adhesion of the paint.
Techniques for Painting Ceramic Mugs
When it comes to painting ceramic mugs, there are several techniques you can try. Here are a few ideas to spark your creativity:
-
Freehand Painting: With a steady hand, you can paint directly onto the mug using ceramic paint and brushes. Create intricate designs, patterns, or even write inspiring quotes or names. Let your imagination guide your brushstrokes.
-
Stenciling: If you’re not confident in your freehand painting skills, stenciling is a great option. Use pre-made stencils or create your own by cutting shapes out of adhesive vinyl or contact paper. Secure the stencil onto the mug and fill it in with your chosen paint colors.
-
Marbling: Create a stunning marbled effect by mixing different colors of ceramic paint together. Apply the paint to the mug using a sponge or by pouring it directly onto the surface. Swirl the colors together with a toothpick or a thin brush to achieve a marbled look.
-
Stamping: Add texture and patterns to your mugs using stamps. You can use pre-made stamps or create your own using materials like erasers, potatoes, or sponges. Dip the stamp in ceramic paint and press it onto the mug to transfer the design.
Remember to let the paint dry completely before baking the mug to set the design. Follow the instructions on the ceramic paint or porcelain markers for the recommended baking temperature and duration. This step ensures that your design becomes permanent and dishwasher-safe.
Now that you know the basics of hand-painting ceramic mugs, it’s time to unleash your creativity and start designing your own unique mugs. Whether you’re making a set of matching mugs for your family or creating personalized gifts for friends, hand-painted ceramic mugs are sure to make a lasting impression. So grab your paintbrushes, gather your favorite colors, and let your creativity flow!
For more ideas on homemade craft ideas, DIY home decor crafts, and budget-friendly craft ideas, be sure to check out our other articles on mommymakeovernetwork.com. Happy crafting!
Homemade Candles
There’s something truly special about a homemade candle. Not only do they create a warm and cozy atmosphere, but they also make for thoughtful and personalized gifts. Making your own candles allows you to customize the fragrance, color, and design to suit your preferences or the preferences of the recipient. In this section, I will guide you through a step-by-step process for making homemade candles.
Creating a Warm and Cozy Atmosphere
Homemade candles have the power to transform any space into a warm and cozy sanctuary. The flickering flame adds a touch of ambiance and relaxation to your home. Whether you’re enjoying a quiet evening alone or hosting a gathering with friends, homemade candles create an inviting and comforting atmosphere. From floral scents to warm and spicy aromas, you can choose a fragrance that perfectly suits the mood or season.
To get started, you’ll need a few basic materials and equipment such as candle wax, wicks, fragrance oils, candle dye, a double boiler or microwave-safe container, and heat-resistant containers for pouring the melted wax. You can easily find these supplies at craft stores or order them online. Now, let’s dive into the step-by-step guide to making homemade candles.
Step-by-Step Guide to Making Homemade Candles
Step 1: Prepare your work area
- Set up a clean and well-ventilated workspace.
- Cover the area with newspaper or a protective surface to catch any spills.
- Gather all your materials and tools within reach.
Step 2: Measure and melt the wax
- Begin by measuring the amount of wax you’ll need for your candles.
- Melt the wax in a double boiler or a microwave-safe container, following the manufacturer’s instructions.
- Stir the wax occasionally to ensure even melting.
Step 3: Add fragrance and color
- Once the wax has melted, remove it from the heat source.
- Add your desired fragrance oil and candle dye, adjusting the amounts to achieve your desired scent and color intensity.
- Stir the mixture thoroughly to distribute the fragrance and color evenly.
Step 4: Prepare the containers and wicks
- While the wax is still liquid, prepare your containers by placing the wicks in the center.
- Make sure the wicks are straight and secure them in place using a wick sticker or a small amount of melted wax.
Step 5: Pour the wax
- Carefully pour the melted wax into the prepared containers, ensuring that the wicks remain centered.
- Leave a small amount of space at the top of the container to allow for proper cooling and contraction of the wax.
Step 6: Allow the candles to cool and set
- Let the candles cool and solidify completely, which may take a few hours.
- Avoid moving or disturbing the candles during this time to prevent any uneven surfaces or air bubbles.
Step 7: Trim the wicks and enjoy
- Once the candles have fully hardened, trim the wicks to a suitable length, about ¼ inch.
- Light up your homemade candles and bask in the warm, cozy glow.
Making homemade candles is a delightful and rewarding craft that allows you to create unique and personalized gifts. Don’t be afraid to experiment with different fragrances, colors, and container styles to add your own personal touch. Remember to practice candle safety by never leaving a burning candle unattended and keeping them away from flammable materials. Enjoy the process of creating beautiful and fragrant candles that will bring warmth and joy to any space.
Customized Jewelry
When it comes to crafting unique gifts, customized jewelry stands out as a wonderful choice. Handmade jewelry allows you to create personalized pieces that hold sentimental value for your loved ones. Whether it’s a necklace, bracelet, or earrings, customizing jewelry adds a special touch that makes the gift truly one-of-a-kind.
Craft Unique Pieces for Your Loved Ones
Creating customized jewelry allows you to tailor the design to match the recipient’s taste and style. Consider their favorite colors, materials, and themes when designing the piece. For example, if they love nature, you might incorporate leaf or flower motifs into a necklace pendant. If they prefer minimalist designs, a delicate and simple bracelet may be the perfect choice.
To make the jewelry even more meaningful, you can add personalized elements such as initials, birthstones, or engraved messages. These details make the piece truly unique and show the recipient that you put thought and effort into crafting their gift.
DIY Jewelry Making Tips and Ideas
If you are new to jewelry making, don’t worry! There are various techniques and materials available that make it accessible for beginners. Here are a few tips and ideas to get you started:
-
Beading: Beading is a popular technique that involves stringing beads onto wire or thread to create necklaces, bracelets, and earrings. Experiment with different bead sizes, shapes, and colors to achieve the desired look.
-
Wire Wrapping: Wire wrapping is a versatile technique that allows you to create intricate designs using wire. You can create wire-wrapped pendants, rings, or earrings by manipulating the wire to hold gemstones or beads.
-
Macramé: Macramé is a knotting technique that can be used to create bracelets, necklaces, and even earrings. With a variety of knotting patterns available, you can achieve different textures and designs.
-
Resin Jewelry: Resin jewelry involves mixing resin and hardener to create a clear, glossy material that can be poured into molds or used to encase small objects like dried flowers or charms. This technique allows for endless creativity and customization.
Remember, practice makes perfect, so don’t be afraid to experiment and refine your skills. You can find a wide range of jewelry-making supplies and tutorials online and at craft stores. Don’t forget to check out our article on homemade craft ideas for more inspiration!
By crafting customized jewelry, you can create heartfelt gifts that reflect the individuality of your loved ones. The thought, effort, and personal touch you put into each piece will make it a cherished keepsake for years to come.
Hand-Knitted Scarves
When it comes to keeping warm in style, few handmade gifts can rival the charm and coziness of hand-knitted scarves. Knitting a scarf for someone you care about not only provides them with a practical accessory but also a heartfelt reminder of your love and creativity. Here, I will share some essential knitting techniques to help you create beautiful scarves.
Essential Knitting Techniques for Scarves
1. Casting On
To start knitting your scarf, you’ll need to cast on stitches. The long-tail cast-on method is commonly used for scarves. Hold the yarn with both hands, leaving a long tail. Make a slipknot and place it on the needle. Then, using the working yarn and the tail, create the desired number of stitches on the needle.
2. Knit Stitch
The knit stitch is the foundation of most knitting projects, including scarves. Insert the right needle into the first stitch on the left needle, going from left to right. Wrap the yarn around the right needle from back to front and pull it through the stitch, slipping the old stitch off the left needle. Repeat this process across the row.
3. Purl Stitch
The purl stitch creates a different texture on your scarf. Insert the right needle into the first stitch on the left needle, going from right to left. Wrap the yarn around the right needle from front to back and pull it through the stitch, slipping the old stitch off the left needle. Repeat this process across the row.
4. Garter Stitch
The garter stitch is achieved by knitting every stitch on every row. This creates a bumpy texture on both sides of the fabric, making it reversible. You can create a simple garter stitch scarf by knitting every row until you reach the desired length.
5. Stockinette Stitch
The stockinette stitch is created by knitting one row and purling the next. This creates a smooth, “V” shaped pattern on one side and a bumpy texture on the other side. If you prefer a smooth, flat side for your scarf, make sure to add a border of garter stitch at the beginning and end of each row.
6. Binding Off
Once you’ve reached the desired length for your scarf, it’s time to bind off. Knit the first two stitches of the row. Using the left needle, lift the first stitch over the second stitch and off the right needle. Knit the next stitch, and repeat the process of lifting the previous stitch over the newly knitted stitch. Continue until you have one stitch remaining, then cut the yarn and thread it through the last stitch to secure it.
By mastering these essential knitting techniques, you’ll be able to create beautiful and personalized scarves for your loved ones. Remember to choose a soft and cozy yarn that will keep them warm during the colder months. Happy knitting!
For more homemade craft ideas, including easy sewing projects and diy home decor crafts, visit our website.
Wooden Cutting Boards
Crafting functional kitchen essentials is a wonderful way to showcase your creativity and thoughtfulness. One unique handmade gift idea that is both practical and beautiful is a wooden cutting board. These versatile boards not only provide a sturdy surface for meal preparation but also add a touch of natural elegance to any kitchen.
Crafting Functional Kitchen Essentials
Wooden cutting boards are cherished by home cooks for their durability and natural beauty. They are perfect for slicing and dicing ingredients, and their wooden surface helps to preserve the sharpness of knives. Additionally, wooden cutting boards are less likely to harbor bacteria compared to plastic cutting boards, making them a popular choice among chefs and cooking enthusiasts.
When crafting a wooden cutting board, it’s important to choose the right type of wood. Hardwoods like maple, walnut, and cherry are excellent options due to their durability and resistance to moisture. Avoid using softwoods or wood species that may contain toxins.
Steps to Making Your Own Wooden Cutting Board
Creating your own wooden cutting board is a rewarding and enjoyable process. Here are the basic steps to get you started:
-
Gather the materials: You will need a suitable wood plank, a saw, sandpaper, food-grade mineral oil, and a brush or cloth for application.
-
Measure and cut the wood: Determine the desired dimensions for your cutting board and use a saw to cut the wood plank accordingly. Remember to wear safety goggles and follow proper cutting techniques.
-
Sand the surface: Use sandpaper to smooth the surface and edges of the cut wood plank. Start with a coarser grit and gradually move to finer grits for a polished finish.
-
Apply food-grade mineral oil: Apply a generous amount of food-grade mineral oil to the entire surface of the cutting board using a brush or cloth. Allow the oil to soak in and repeat the process several times to ensure thorough penetration.
-
Let it cure: Let the cutting board cure for at least 24 hours, allowing the oil to fully penetrate the wood and create a protective barrier.
-
Maintenance: Advise the recipient to regularly apply a thin coat of food-grade mineral oil to keep the cutting board moisturized and protected. This will help prevent the wood from drying out or cracking.
By following these steps, you can create a unique and functional wooden cutting board that will be treasured by its recipient. Remember to personalize the gift by adding decorative touches or engraving their initials on the board for an extra special touch.
Wooden cutting boards are just one of the many handmade gift ideas that can unleash your creativity and bring joy to those around you. Explore more homemade craft ideas on our website here to discover new ways to express your creativity and make heartfelt gifts for your loved ones.
Personalized Tote Bags
Tote bags are not only practical but also offer a great opportunity to showcase individual style. Whether you’re making a tote bag for yourself or as a gift for someone special, there are various DIY techniques for customizing these versatile accessories.
Showcasing Individual Style
Personalized tote bags allow you to express your unique personality and creativity. Whether you prefer bold and vibrant designs or subtle and minimalist patterns, the possibilities are endless. You can customize your tote bag with:
- Fabric markers: These markers allow you to draw, write, or doodle directly on the fabric surface. You can let your imagination run wild and create intricate designs or simply add a personal message.
- Fabric paint: With fabric paint, you can apply colors and patterns to your tote bag. Use brushes, sponges, or even stencils to create beautiful designs. Experiment with different techniques such as splattering, stamping, or block printing.
- Iron-on transfers: Iron-on transfers are a convenient and easy way to add images, logos, or text to your tote bag. Simply print your desired design onto transfer paper, follow the instructions, and apply it to the fabric with an iron.
- Applique: Applique involves attaching fabric shapes or designs onto the tote bag using stitching or fabric glue. You can create appliques from various fabrics, such as felt or patterned cotton, and sew or stick them onto the bag to add texture and dimension.
Remember to wash and iron your tote bag before customizing it to ensure a clean and smooth surface for your designs. Get creative, experiment with different techniques, and have fun showcasing your individual style!
For more homemade craft ideas, check out our article on homemade craft ideas.
DIY Techniques for Customizing Tote Bags
Once you have chosen your desired customization technique, follow these simple steps to customize your tote bag:
- Prepare the tote bag: Make sure the tote bag is clean and ironed. This provides a smooth surface for your designs and ensures they adhere properly.
- Plan your design: Before you start applying colors or patterns, plan out your design on paper or sketch it directly on the tote bag with a pencil. This will help you visualize the final product and make any necessary adjustments.
- Protect the surface: Place a piece of cardboard or wax paper inside the tote bag to prevent any paint, markers, or glue from bleeding through to the other side.
- Apply your design: Begin applying your chosen customization technique. Whether you’re using fabric markers, paint, iron-on transfers, or applique, follow the specific instructions for each method. Take your time, work patiently, and allow each layer to dry or set properly before moving on to the next.
- Finishing touches: Once your design is complete and dry, iron the tote bag (if necessary) to set the colors or heat-set the design. This will ensure the longevity of your customization.
Remember to care for your personalized tote bag by following the specific care instructions for the materials used. Whether you’re using fabric markers, paint, or applique, it’s important to protect and preserve your design for long-lasting enjoyment.
With these DIY techniques for customizing tote bags, you can create a one-of-a-kind accessory that reflects your personal style or makes a thoughtful gift for someone special. Let your imagination soar and unleash your creativity onto the canvas of a tote bag.
Handmade Bath Bombs
Indulge in Relaxation and Self-Care
There’s nothing quite like indulging in a luxurious bath, and handmade bath bombs are the perfect addition to elevate your bathing experience. These fizzing delights not only add a touch of excitement to your tub but also provide a soothing and aromatic escape from the stresses of daily life. Making your own bath bombs allows you to customize the ingredients and scents, ensuring a truly personalized self-care experience.
Ingredients and Instructions for Making Bath Bombs
Making bath bombs at home is easier than you might think, and the process allows for endless creativity. Here’s a basic recipe to get you started:
Ingredients:
- 1 cup baking soda
- 1/2 cup citric acid
- 1/2 cup Epsom salt
- 1/2 cup cornstarch
- 2 1/2 tablespoons almond oil or coconut oil
- 3/4 tablespoon water
- 15-20 drops of your favorite essential oils
- Food coloring (optional)
- Dried flower petals or herbs (optional)
Instructions:
In a mixing bowl, combine the baking soda, citric acid, Epsom salt, and cornstarch. Mix well to ensure even distribution of ingredients.
In a separate small bowl, whisk together the almond oil (or coconut oil), water, essential oils, and food coloring. Make sure the wet ingredients are thoroughly combined.
Slowly pour the wet ingredients into the dry mixture, while continuously stirring. Be sure to mix everything well to avoid any clumps.
If desired, add dried flower petals or herbs to the mixture for an extra touch of luxury and visual appeal. Gently fold them into the mixture.
Once the mixture is well-combined and holds its shape when squeezed, it’s time to mold your bath bombs. You can use specialized bath bomb molds or simply shape them by hand into your desired size and shape.
Place the molded bath bombs on a tray or a sheet of wax paper and allow them to dry and harden for at least 24 hours. This drying time is crucial to ensure the bath bombs hold their shape when used.
After the bath bombs have thoroughly dried, they are ready to be used or gifted. Store them in an airtight container to maintain their freshness and integrity.
Remember, this is just a basic recipe, and you can experiment with different ingredients, scents, colors, and shapes to create bath bombs that reflect your personal style and preferences. For more homemade beauty product ideas, check out our article on homemade natural beauty products.
With your handmade bath bombs, you can transform an ordinary bath into a luxurious spa-like experience. Treat yourself or surprise your loved ones with these delightful creations that are both visually appealing and nourishing for the skin. Enjoy the relaxation and self-care that comes with indulging in your own handmade bath bombs.
Embroidered Wall Art
If you’re looking to add a touch of elegance and personalization to your home, embroidered wall art is a beautiful and unique handmade gift idea. Embroidery allows you to create stunning designs and patterns using various stitches and threads, making each piece a one-of-a-kind work of art.
Adding a Touch of Elegance to Your Home
Embroidered wall art instantly adds a sophisticated and artistic touch to any room. Whether you’re embellishing a plain fabric canvas or creating a framed embroidery piece, the intricate details and textures of embroidery can bring life and character to your walls. From floral motifs to geometric patterns, the possibilities for creating stunning wall art are endless.
By choosing colors, patterns, and designs that resonate with your personal style and home decor, you can create a truly unique piece that reflects your individuality. Embroidered wall art also makes for a thoughtful and heartfelt gift that can be cherished for years to come.
Embroidery Techniques for Creating Wall Art
Embroidery offers a wide range of techniques that can be used to create captivating wall art. Here are a few popular embroidery techniques to consider:
- Cross-Stitch: Cross-stitch is a versatile and widely used embroidery technique. It involves creating X-shaped stitches to form intricate patterns and designs. Cross-stitch patterns can range from simple to complex, allowing you to create wall art that suits your skill level and aesthetic preferences.
Crewel Embroidery: Crewel embroidery is characterized by its use of wool threads and a variety of stitches, such as the chain stitch and the satin stitch. This technique creates a textured and dimensional effect, perfect for adding depth to your wall art.
Sashiko Embroidery: Originating from Japan, sashiko embroidery is known for its geometric patterns and running stitch technique. This style of embroidery creates bold and striking designs that can make a statement on your walls.
Contemporary Embroidery: For those looking to explore more modern and abstract designs, contemporary embroidery techniques offer endless possibilities. With techniques like free-motion embroidery and mixed-media embroidery, you can create unique and expressive wall art that pushes the boundaries of traditional embroidery.
Experimenting with different stitches, threads, and fabrics will allow you to create a diverse collection of embroidered wall art. Whether you’re a seasoned embroidery artist or just starting out, the joy of creating personalized and elegant wall art is a rewarding experience.
Remember to let your creativity guide you as you explore the world of embroidered wall art. From selecting the right materials to choosing patterns and colors, each decision you make has the potential to transform your walls into a gallery of handmade beauty. For more inspiration on homemade craft ideas, check out our article on homemade craft ideas.
Homemade Natural Beauty Products
If you’re looking to nourish your skin with natural ingredients, creating your own homemade beauty products can be a wonderful and thoughtful gift idea. These DIY creations allow you to customize the products to suit your loved ones’ preferences and provide them with the goodness of homemade skincare. Here are some recipes for DIY natural beauty products that you can try:
Homemade Lip Balm
Lip balm is an essential item in everyone’s beauty routine, especially during the dry winter months. Making your own lip balm allows you to control the ingredients and create a personalized product. Here’s a simple recipe to get you started:
| Ingredients | Quantity |
|---|---|
| Beeswax | 1 tablespoon |
| Coconut oil | 1 tablespoon |
| Shea butter | 1 tablespoon |
| Essential oil (e.g., peppermint or lavender) | A few drops |
| Empty lip balm tubes or containers | – |
- In a double boiler, melt the beeswax, coconut oil, and shea butter together.
- Once melted, remove from heat and add a few drops of your chosen essential oil for fragrance.
- Pour the mixture into empty lip balm tubes or containers and let it cool and solidify.
Soothing Bath Salts
A warm bath can be incredibly relaxing, and adding homemade bath salts can enhance the experience. Bath salts help to soothe muscles and leave the skin feeling rejuvenated. Here’s a recipe for making your own bath salts:
| Ingredients | Quantity |
|---|---|
| Epsom salts | 1 cup |
| Sea salt | 1/2 cup |
| Baking soda | 1/2 cup |
| Essential oil (e.g., lavender or eucalyptus) | A few drops |
| Dried flowers or herbs (optional) | – |
- In a bowl, combine the Epsom salts, sea salt, and baking soda.
- Add a few drops of your chosen essential oil for scent and mix well.
- If desired, add dried flowers or herbs for an extra touch of relaxation and visual appeal.
- Store the bath salts in a glass jar or container.
Nourishing Body Butter
Body butter is a luxurious and deeply moisturizing product that can keep the skin soft and hydrated. Making your own body butter allows you to customize the ingredients and scents according to personal preferences. Here’s a simple recipe:
| Ingredients | Quantity |
|---|---|
| Shea butter | 1/2 cup |
| Coconut oil | 1/4 cup |
| Jojoba oil | 1/4 cup |
| Essential oil (e.g., rose or vanilla) | A few drops |
| Glass jar or container | – |
- In a double boiler, melt the shea butter, coconut oil, and jojoba oil together.
- Once melted, remove from heat and add a few drops of your chosen essential oil for fragrance.
- Allow the mixture to cool for a few minutes and then transfer it to a glass jar or container.
- Let it solidify completely before use.
Creating your own homemade natural beauty products not only allows you to personalize gifts but also ensures that you’re using ingredients that are gentle and nourishing for the skin. Experiment with different recipes, scents, and variations to create unique and thoughtful gifts that your loved ones will appreciate. For more homemade craft ideas, visit our article on homemade craft ideas.
Note: It’s important to be aware of any potential allergies or sensitivities to certain ingredients before using homemade beauty products. Perform a patch test on a small area of skin before applying them more widely.